Please note that Support and Updates are only available to customers who have License copies of this software.
Pipeline are the base for application.The Pipeline are base where we are going to add stages and then deals.
To add a pipeline, click on PIPELINES on the MAIN MENU and then click on the + Add Pipeline button (as shown below). You will get a new popup window for you to fill in pipeline name.


Stages are added in pipeline.You can create different stages by pipeline.Means every pipeline have different stages.
To add a stage, click on STAGES on the MAIN MENU and then click on the + Add Stage button (as shown below). You will get a new popup window for you to fill in stage name,pipeline for stage.


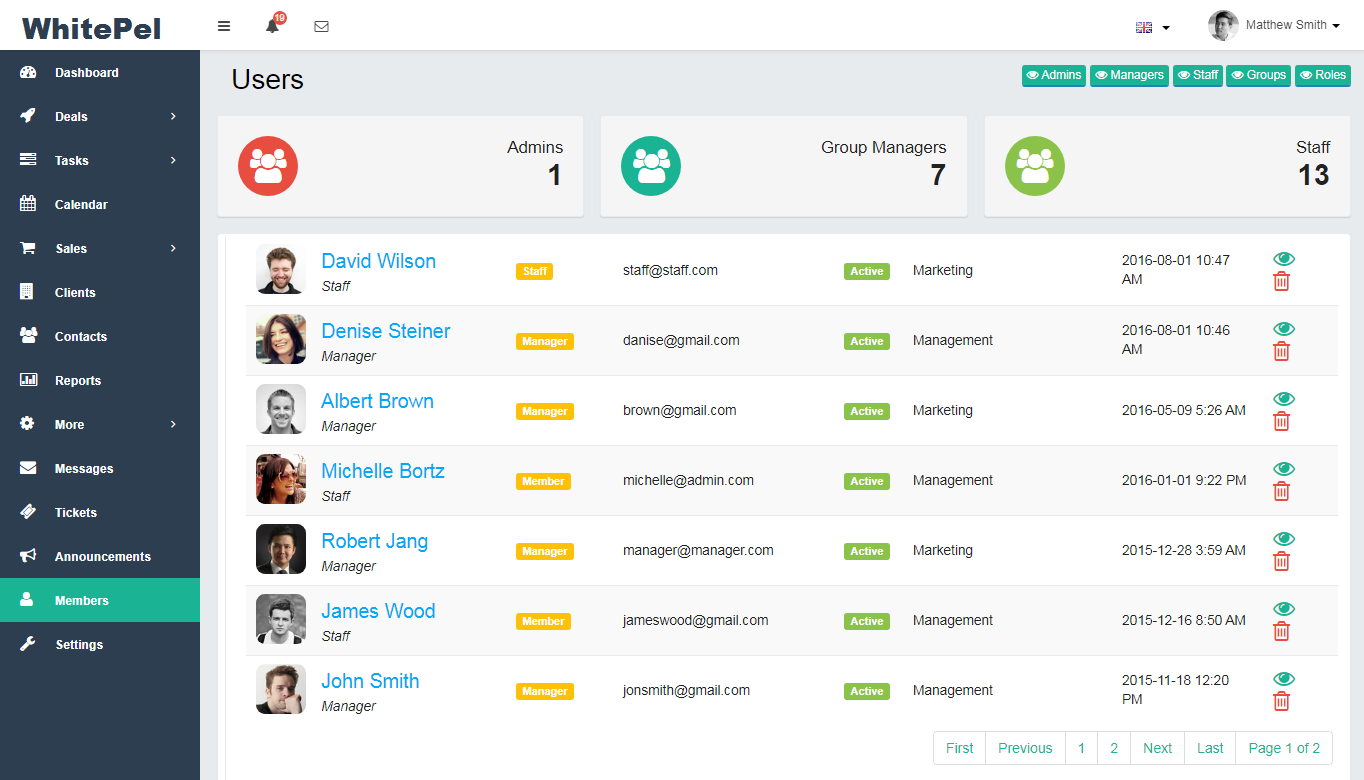
You can create user in application and add later can add it to any deal.
There are four types of users. (a)Admin (b)Manager (c)Staff (d)Client
To add a contact, click on Member on the MAIN MENU and then goes to admin page for add admin, manager page for add manager & staff page to add staff
You will see the profile and update picture and details

Go to Settings then groups. You can create groups for team members.Each team member can belong to a particular GROUP. The starting point is to make sure that you have some groups. The system comes with some some default groups (which you can delete and create you own if you want).


Dashboard where you will see all deals by pipeline.You can change pipeline for view deals and manage it.

To add a deal, click on Dashboard on the MAIN MENU and then click on the + Add Deal button(See above) . You will get a new popup window for you to fill in Deal name etc details for deal.
You can view the list of deals on list dashboard.Add new deal from list dashboard.

Deal are the main center point or center of our application.All thinks belongs to deals.Means we are going to add every think like sources,product,files,notes,contacts etc in deal.

A details of the deal shown note,members,sources,products,files,activity of deal,calender etc(See above)
View/Add/Edit/Delete tasks that are related to deal.The task in deal are visible to all in deal.
Search/Add/View/Delete the products. You can search the products and then click on product for add.Also update product quantity and discount on product.
Search/Add/View/Delete the sources. You can search the sources and then click on source for add
Search/Add/View/Delete the contacts. You can search the contacts and then click on contact for add.
View/Add/Edit/Delete deal files
View/Add/Edit/Delete deal comments/messages & reply to messages.
Customer can give feedback using this tab on deal.You can reply to any feedback.
You can Add/Edit notes.These notes are private and only visible to you.
You can Add/Edit/Delete deal invoices.
You can change values of custom fields in deal from this tab.
Client Permissions:- Allow or not clients to view tab like tasks, products, sources, contacts, files, custom fields
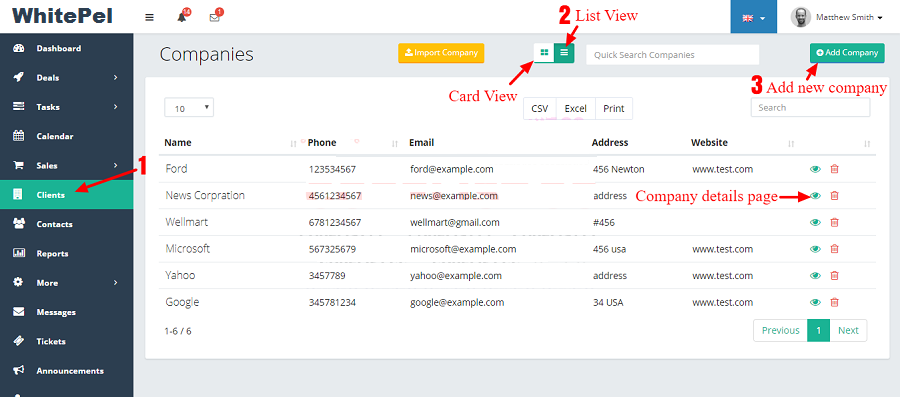
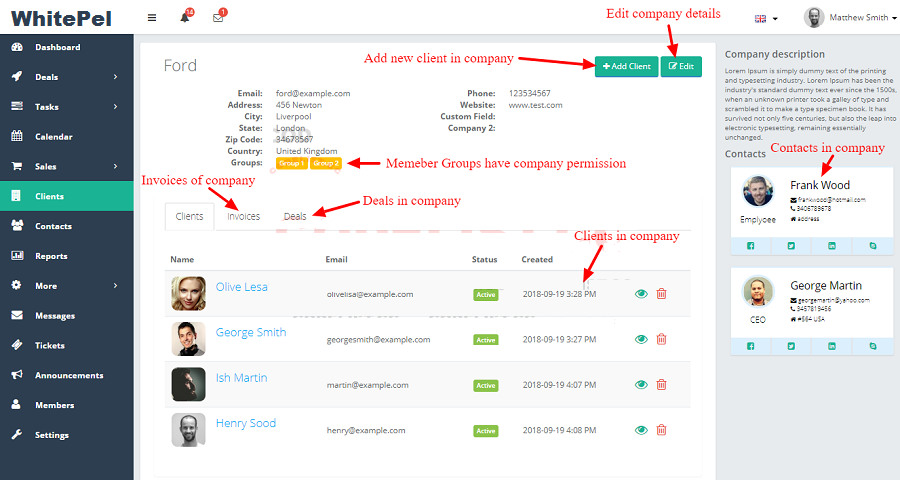
You can add any company information in application.You can add clients,contacts,deals,invoices in company
To add a company, click on CLIENTS on the MAIN MENU and then click on the + Add Company button (as shown below). You will get a new popup window for you to fill in company name etc details. Fill up the company details and save it.

Task is added in any deal mean you can assign any task for deal.There are 2 menu for Tasks
Admin/User can able to View/Edit/Delete task created by him.Means my task where admin/user see the task assign to him or created by him


Admin can able to View/Edit/Delete all the task in the application.Here admin will see the task created by which user,which pipeline or stage.

Labels are added in pipeline.You can create different labels by pipeline.Means every pipeline have different labels.
To add a label, click on LABELS on the MAIN MENU and then click on the + ADD LABEL button (as shown below). You will get a new popup window for you to fill in label name,pipeline for label.

Sales module you will see invoices,expenses,payments & tax rates.
To add a invoice, click on INVOICES on the MAIN MENU and then click on the + ADD INVOICE button (as shown below). You will get a new popup window for you to fill in invoice details.

To add a expense, click on EXPENSES on the MAIN MENU and then click on the + ADD EXPENSE button (as shown below). You will get a new popup window for you to fill in expenses details for deal or member.

Here you can see all payments made inside invoices.

You can add/edit/delete tax rates for invoices.

You can create contacts in application and add any number of contacts under or not an company.
To add a contact, click on CONTACT on the MAIN MENU and then click on the + Add Contact button (as shown below). You will get a new popup window for you to fill in contact name,company etc details.


You can create products in application and later can add it to any deal.
To add a contact, click on PRODUCTS on the MAIN MENU and then click on the + Add Product button (as shown below). You will get a new popup window for you to fill in product name,price etc details.

Just click on product name etc to edit it,change it and then click arrow for save.
You can view the deals in product.Just click on view button and you will goes to product view page where you see the deals in product
You can create sources in application and add later can add it to any deal.
To add a source, click on SOURCES on the MAIN MENU and then click on the + Add Source button (as shown below). You will get a new popup window for you to fill in source name.

Just click on source name to edit it,change it and then click arrow for save.
You can view the deals in source.Just click on view button and you will goes to source view page where you see the deals in source.
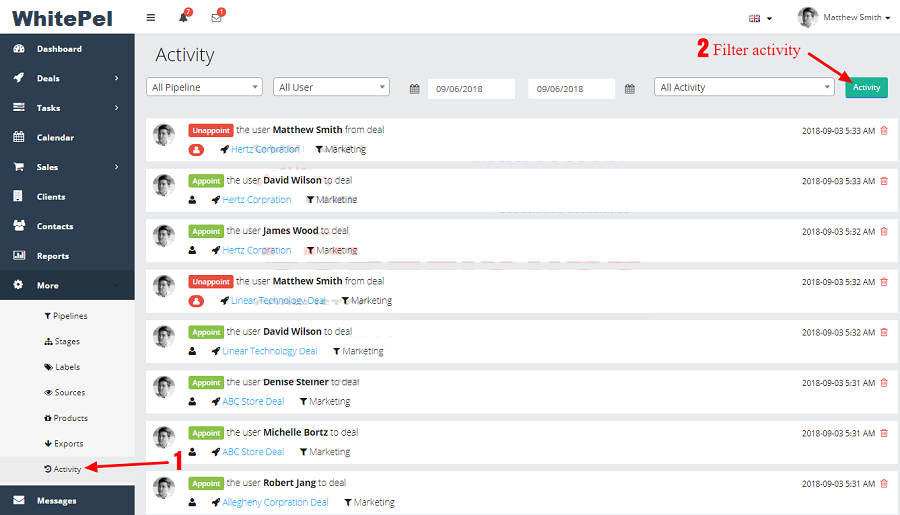
You can view the all the activity done regarding the deal.You can see all activity related to task,source,product,contact etc done in deal.
You can view the report of the deals.There are 2 types of reports

In application you can also message for 4 type of users admin,manager,staff,client with different permissions.The message system allow you to message your members.

In application you can export data.

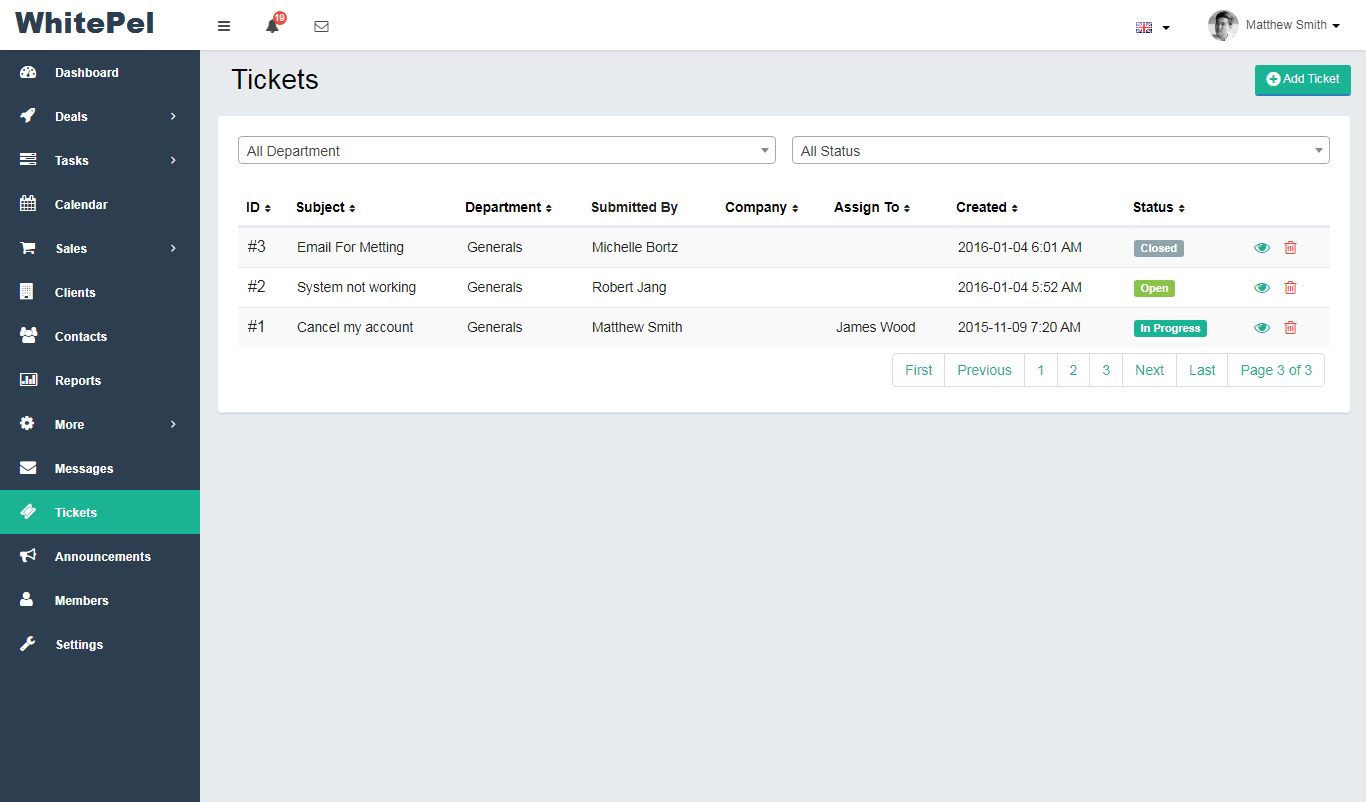
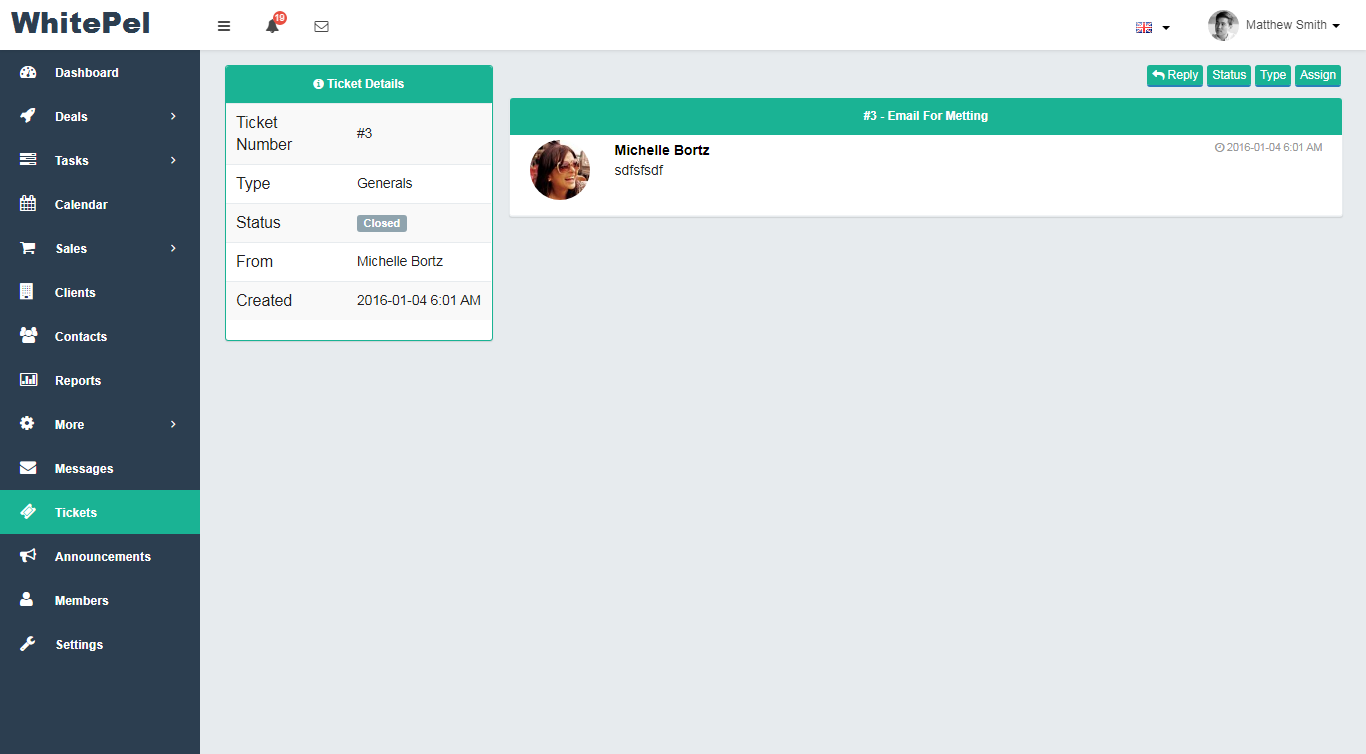
In application you can create a ticket.You or user can reply to any ticket and also can send attachments with ticket.
You can add any custom fields for deals , contact, company in application.
To add a company, click on Custom Fields on the MAIN MENU and then click on the + Add Custom Field button (as shown below). You will get a new popup window for you to fill in Custom fields name etc details.

Do delete a custom field, you simply click the delete icon (![]() ).
).
In application you have setting section.Where you can manage all application settings

This is where you set all your company information (name, telephone, etc)
You can create groups for team members.Each team member can belong to a particular GROUP. The starting point is to make sure that you have some groups. The system comes with some some default groups (which you can delete and create you own if you want).
You can create as many departments as you need (e.g. Support, Sales etc)